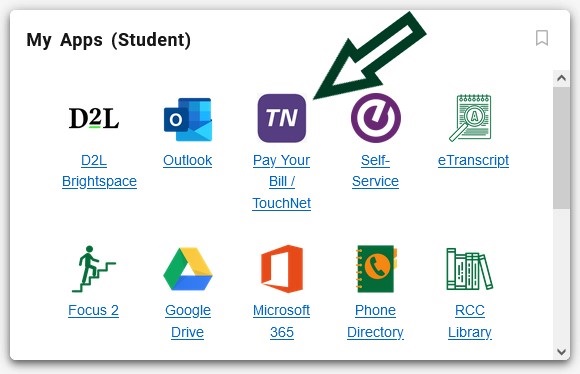
To access your Student Account and make a payment on your bill use the TouchNet link on your myRCC Student Portal (My Apps card)
Using TouchNet
TouchNet is a web-based, real-time service that will provide online, self-service access to your student account and billing history. You may make payment using your Visa, MasterCard, Discover, American Express cards or via an electronic payment from a checking or saving accounts.
- Log into your myRCC portal using your RCC email credentials.
- Select the TouchNet icon under My Apps. This will take you to your Student Account Page.
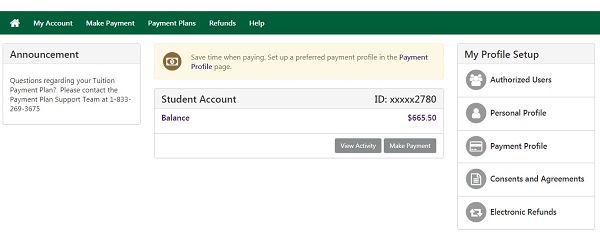
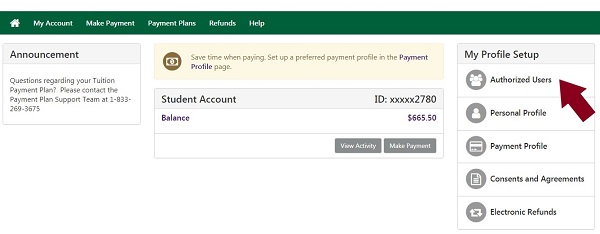
- If you, the student, are making the payments on your account, please follow the instructions #4 -12 below. If someone else is making the payment on your account, you must first create them as an authorized user under the My Profile Setup > Authorized Users. See instructions below to create an authorized user.
- Across the horizontal green header on the Student Accounts page there are five tabs. Click on the Payment Plans tab.
- Click on the Manage Plans tab and then click on the Enroll Now button.

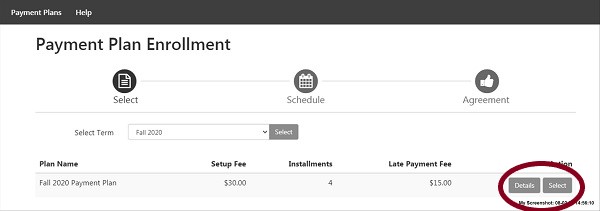
- Enter the term in which you want to create a Payment Plan. In this example, it is Fall 2020.

- You can read the details about the Payment Plan program by clicking on Details button. If you are ready to proceed, click on the Select button.
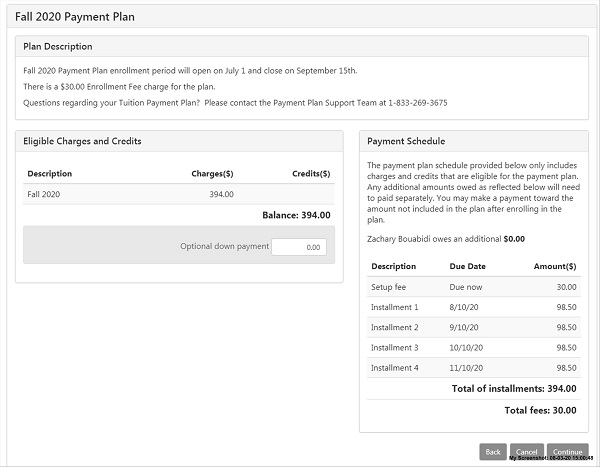
- You will now see the details of your payment plan (see example below). There is a required 5% down payment that will be assessed along with the $40 non-refundable set-up fee at the time you set-up this plan. Click to display the new schedule and/or click on Continue once you have the payment schedule the way that you want it.
- On the Payment Plan Enrollment screen, choose your method of payment by selecting from the options in the drop down box.
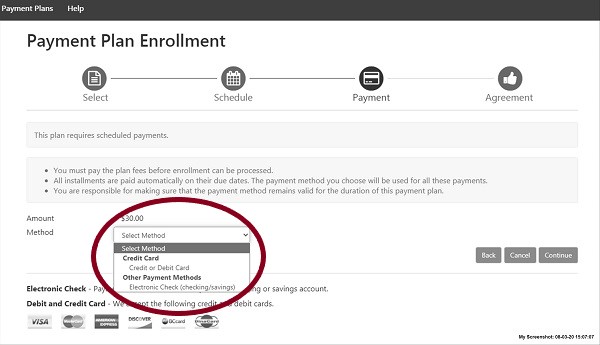
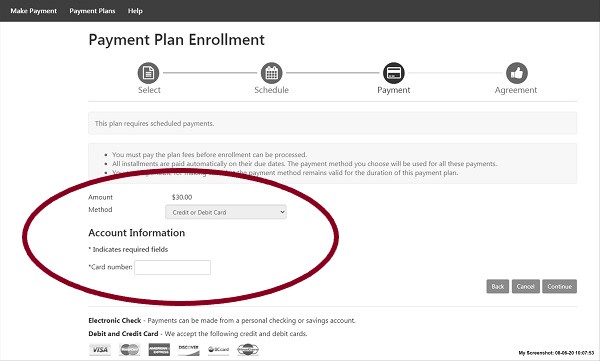
- Next, fill in your Account Information using your credit card or bank information and then click Continue.
- Your Payment Plan Agreement outlining all the terms and payment dates will pop up for your review. You must agree to the terms and conditions by marking the box on the bottom of the page to finalize your agreement. (See example below.) This page also gives you the ability to print information. Click on Print Plan Amounts or Print Agreement to get hard copy print-outs of you plan details. To finalize your payment plan, click on Continue.

- You will get a payment receipt at the end of the process that you can print for your records.
Creating an Authorized User
- Under the My Account Tab, click on Authorized Users.
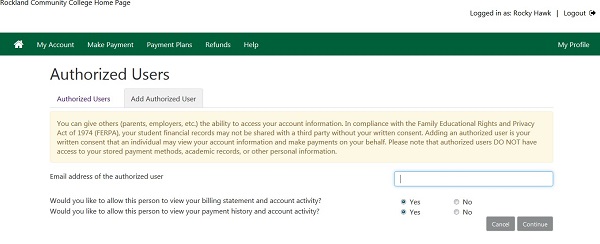
- Enter the email of the Authorized User. If you want more than one person to be authorized to make payments on your account, you will need to make two (or more) separate authorizations.
- Answer the two access questions and then select Continue.
- Two emails will be sent to the Authorized User. The first email will contain their log in credentials and the second email will contain the link to the TouchNet Authorized Users page. From the link sent to your authorized user, he/she will be able to make a payment on your student account. And, based upon how you answered the access questions, your authorized user may be able to view your bill and payment history.
Need Assistance?
Contact us at [email protected]
