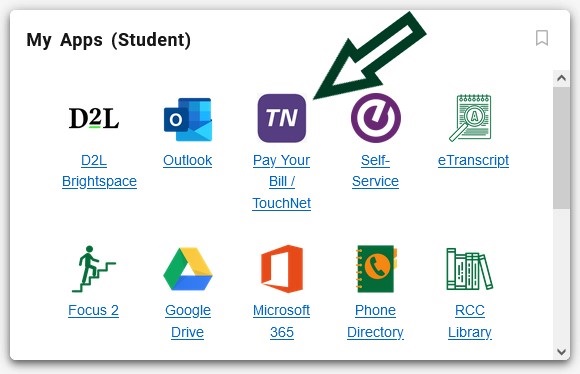
To access your Student Account and make a payment on your bill use the TouchNet link on your myRCC Student Portal (My Apps card)
Using TouchNet
TouchNet is a web-based, real-time service that will provide online, self-service access to your student account and billing history. You may make payment using your Visa, MasterCard, Discover, American Express cards or via an electronic payment from a checking or saving accounts.
- Log into your myRCC portal using your RCC email credentials.
- Select the TouchNet icon under My Apps. This will take you to your Student Account Page.
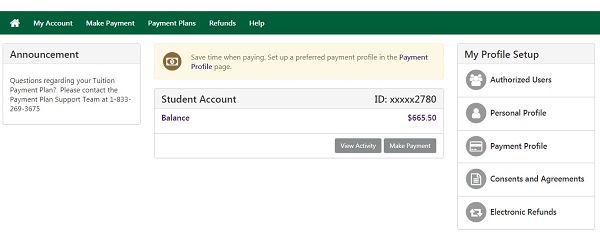
- If you, the student, are making the payments on your account, please follow the instructions #4 -14 below. If someone else is making the payment on your account, you must first create them as an authorized user under the My Profile Setup > Authorized Users. See instructions below to create an authorized user.
- Across the horizontal green header on the Student Accounts page there are five tabs. Click on the Make Payment tab.
- On the Account Payment screen (shown below), select the date you want the payment to be processed.
- Select the term you wish to pay.
- Enter the dollar amount you want to pay and click Continue.
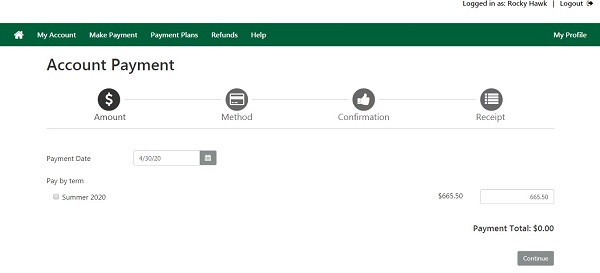
- On the Account Payment screen, select a Payment Method (Credit Card or Bank Account) and click on Continue.
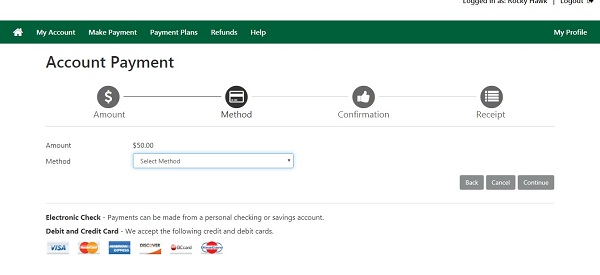
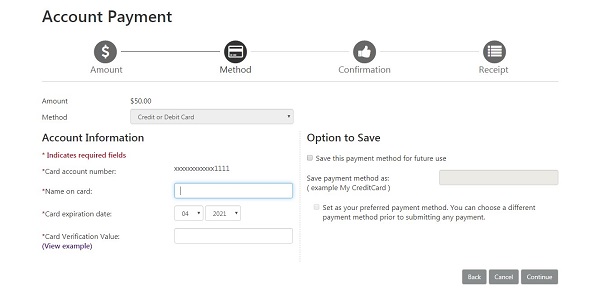
- On the Account Payment screen (shown below), fill in the required information fields for your credit card or bank account.
- If you desire, you have the option to save your payment method in the secure TouchNet environment.
- Once all credit card or bank account information is entered, click on Continue.
- Review and confirm all the Payment Information on the screen.
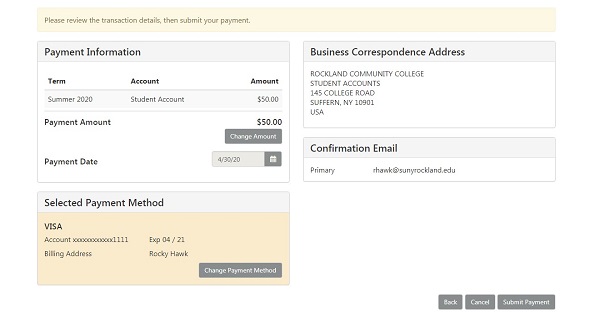
- If you made a mistake, you can go back and correct it, or cancel the transaction.
- If you agree with the information, click on Submit Payment.
Creating an Authorized User
- Under the My Account Tab, click on Authorized Users.
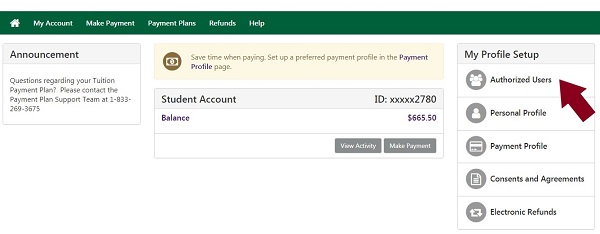
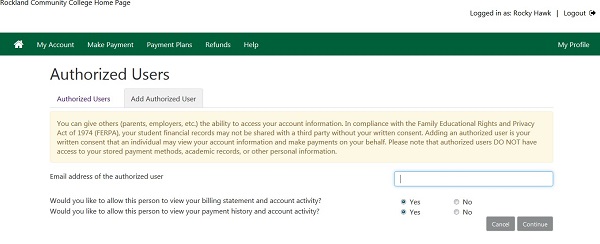
- Enter the email of the Authorized User. If you want more than one person to be authorized to make payments on your account, you will need to make two (or more) separate authorizations.
- Answer the two access questions and then select Continue.
- Two emails will be sent to the Authorized User. The first email will contain their log in credentials and the second email will contain the link to the TouchNet Authorized Users page. From the link sent to your authorized user, he/she will be able to make a payment on your student account. And, based upon how you answered the access questions, your authorized user may be able to view your bill and payment history.
Need Assistance?
Contact us at [email protected]
